Quick Start
Build Your First AI Agent
Step-by-step guide to creating and deploying your first AI agent with Docimal.
Prerequisites
Before you begin, make sure you have:
- •A Docimal account (sign up for free)
- •At least one document (PDF, DOCX, TXT) or website URL to use as a knowledge source
- •Basic understanding of how AI chatbots work (optional)
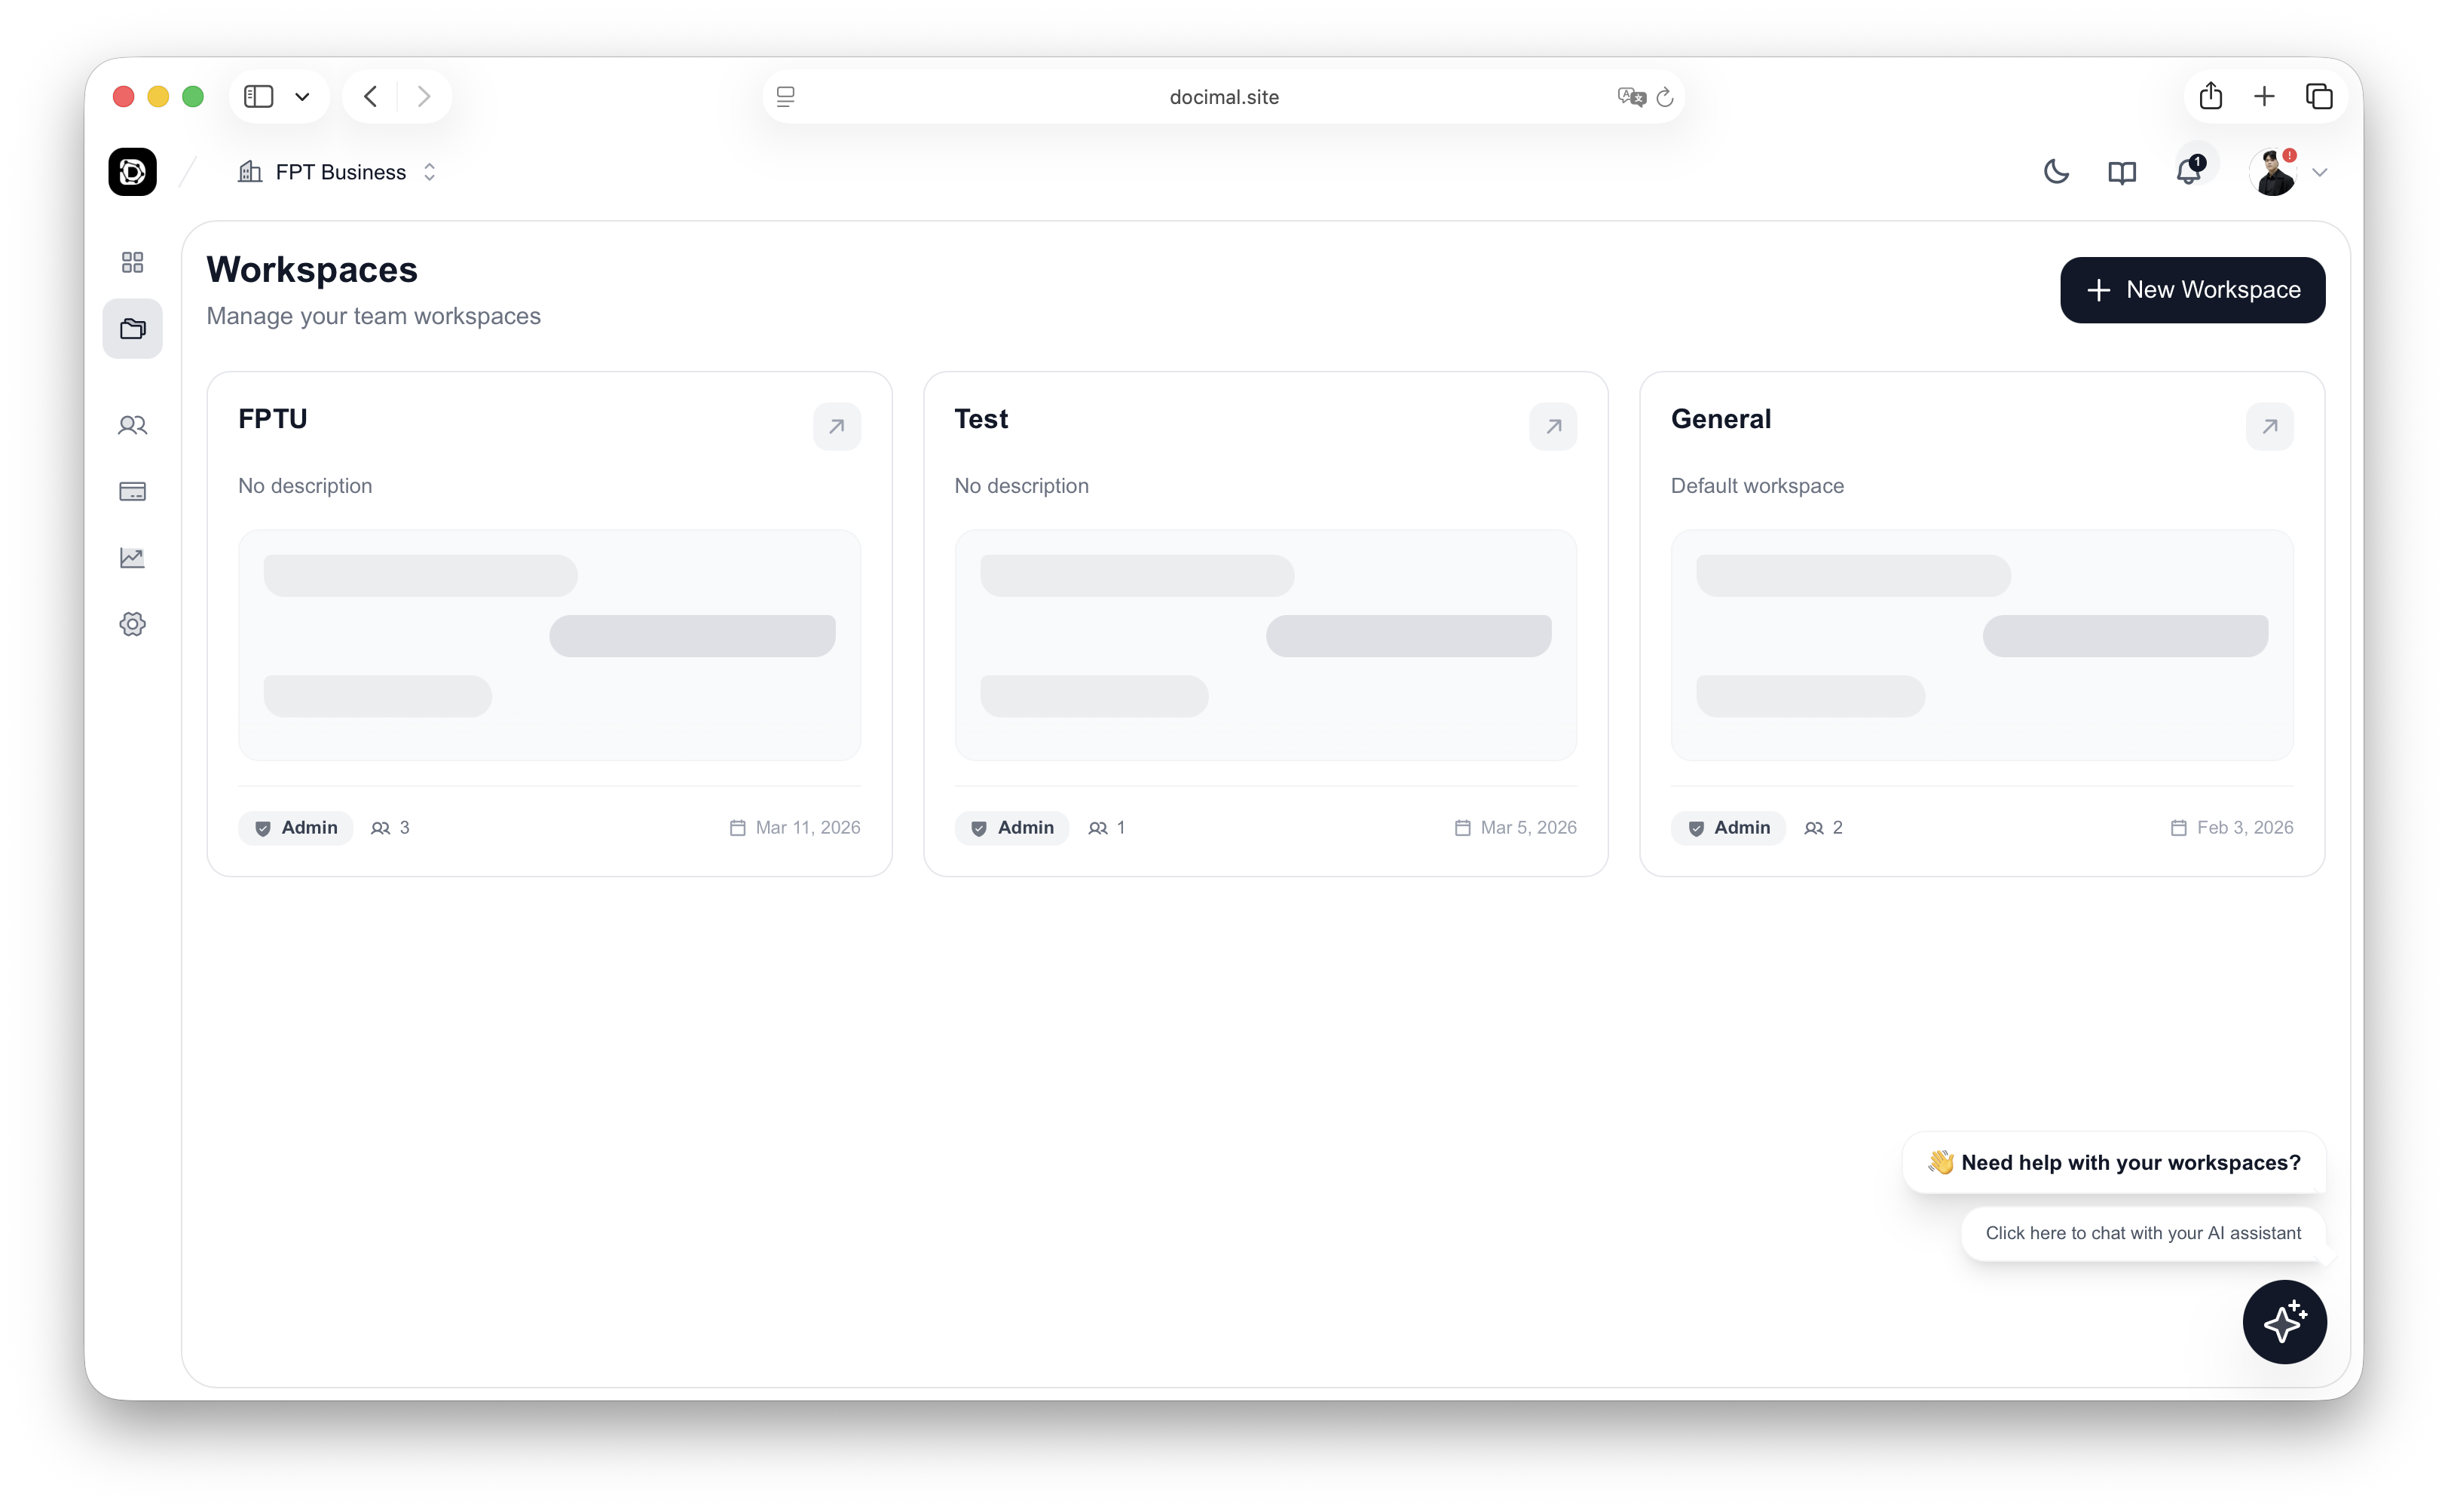
Step 1: Create a Workspace
Workspaces are the foundation of Docimal. They organize your projects, documents, AI agents, and team members in one place.
Log in to Docimal
Navigate to your dashboard at app.docimal.com
Access Workspace Selection
You'll see the workspace selection screen after logging in
Click "New Workspace"
Click the button to create a new workspace
Enter Workspace Details
Give it a descriptive name like "Customer Support", "Product Docs", or "HR Knowledge Base"
Click "Create"
Your workspace will be ready in seconds
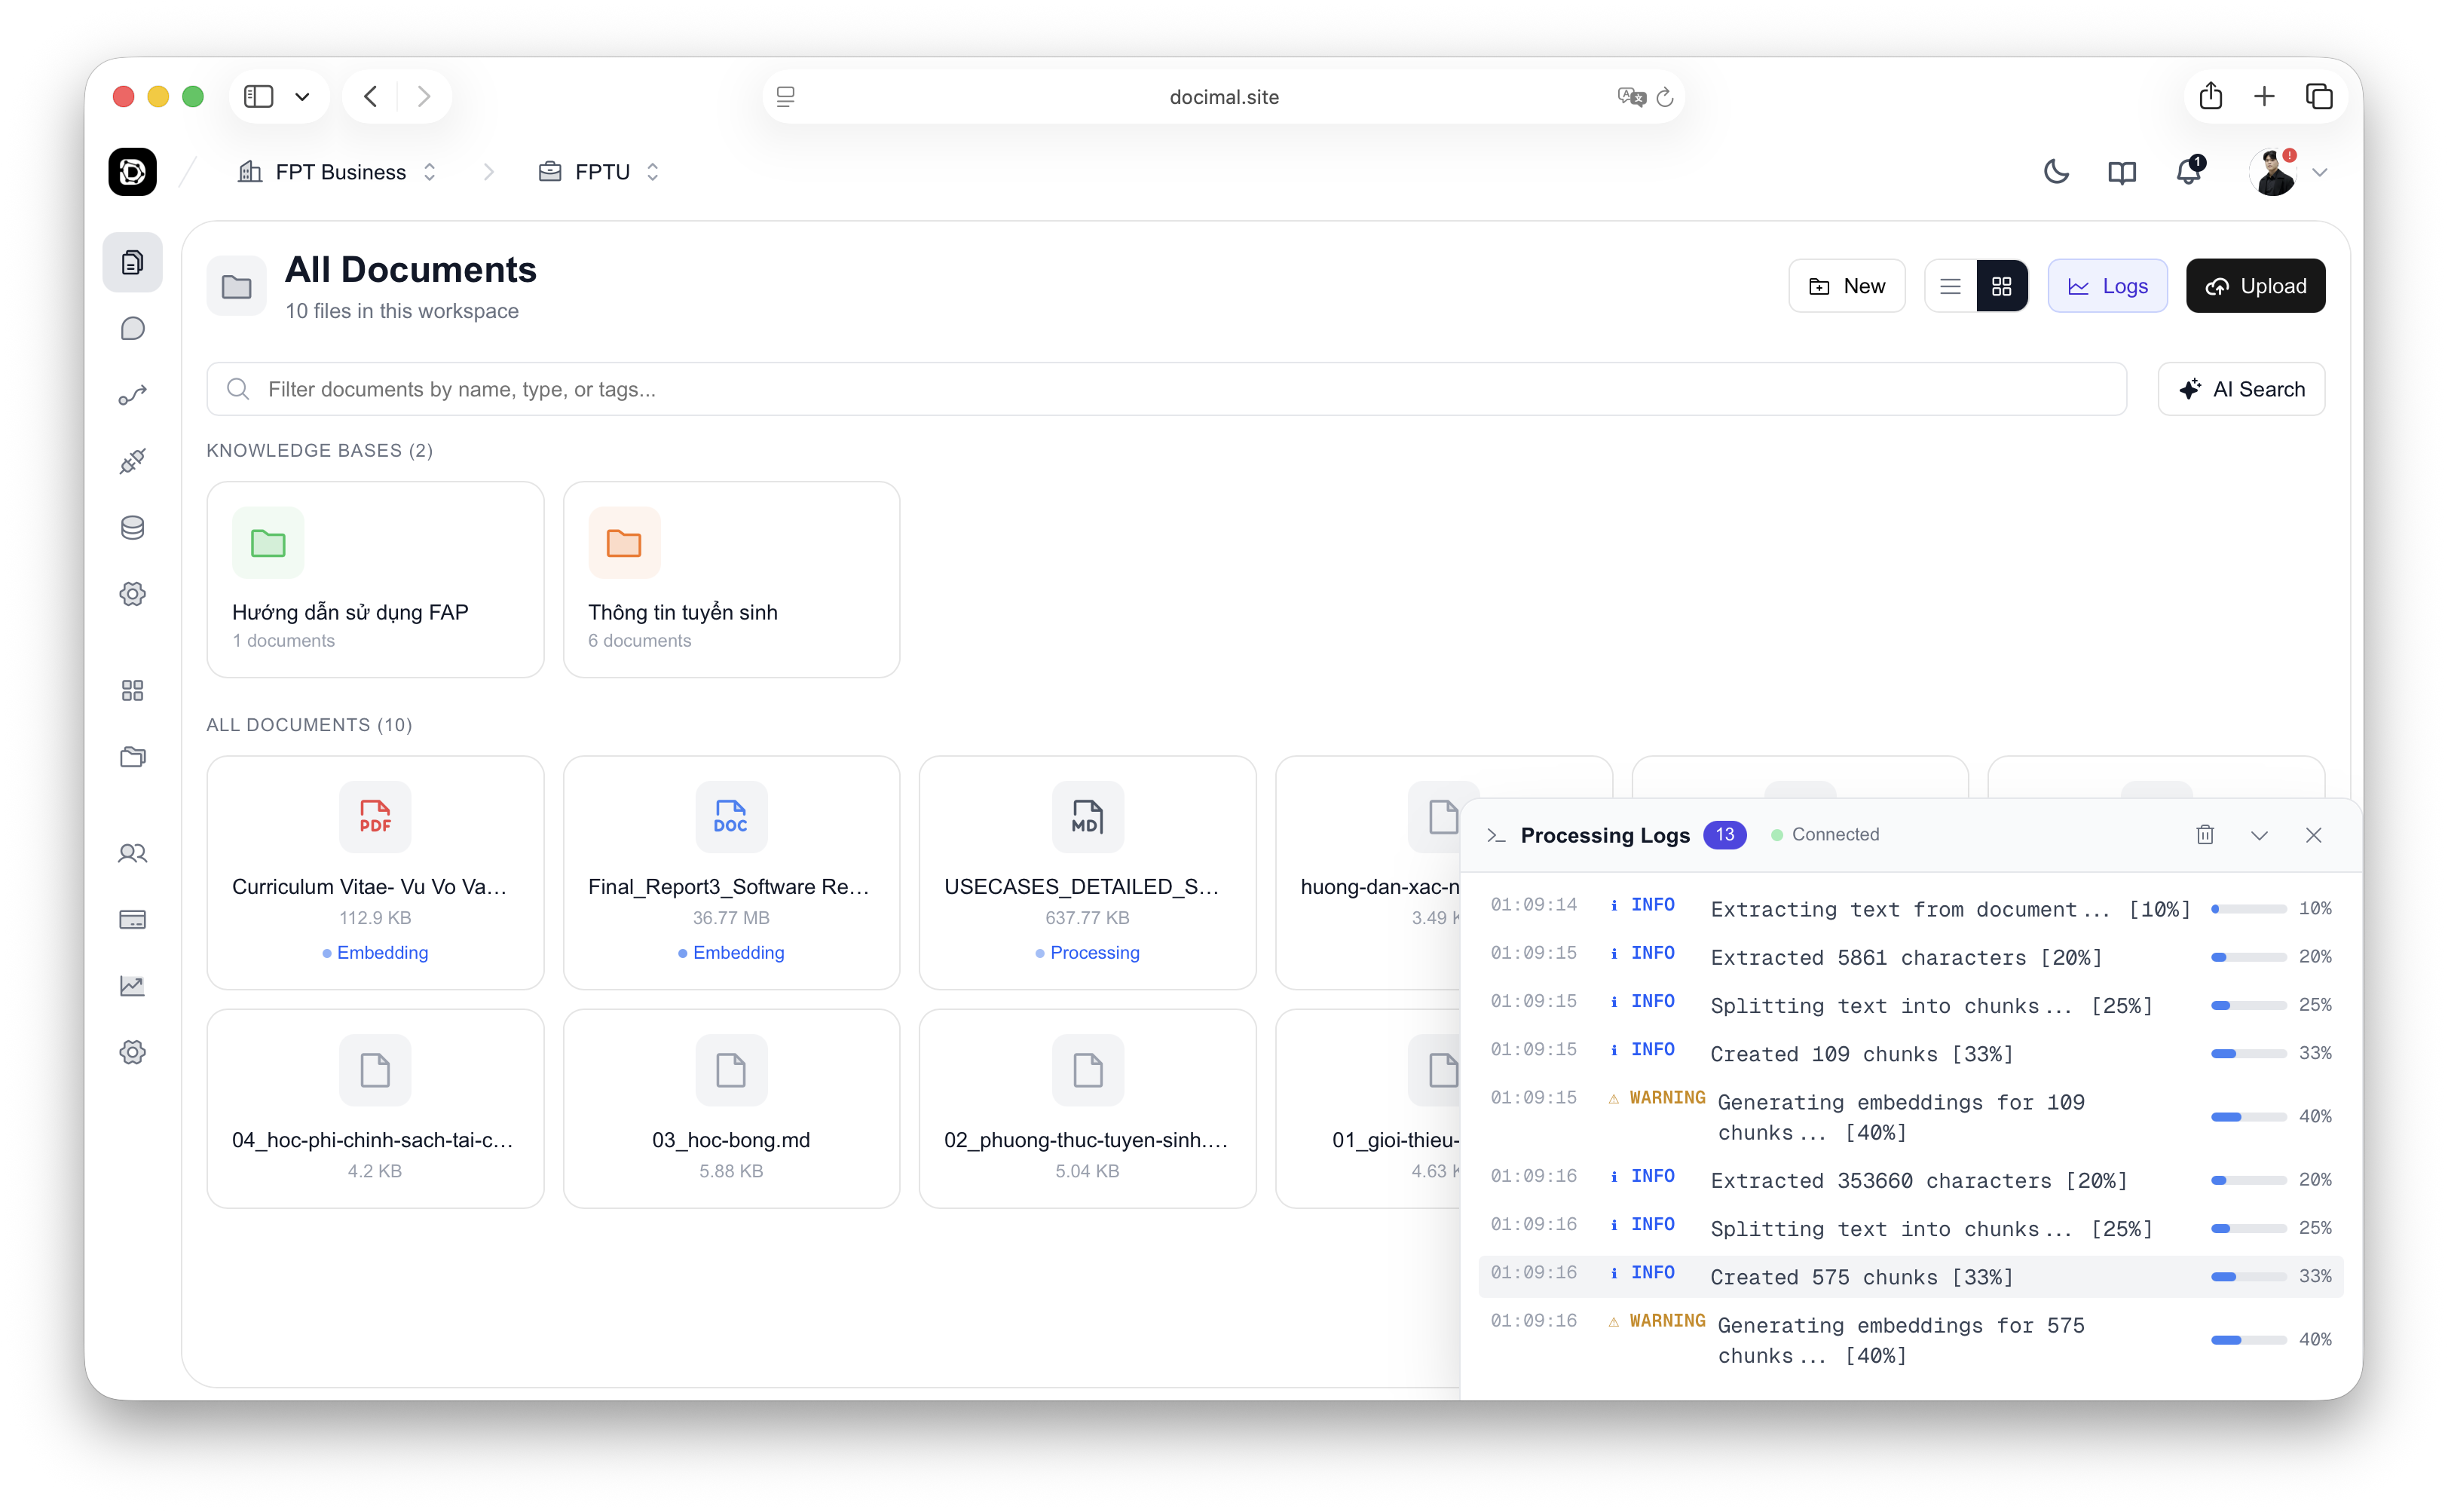
Step 2: Upload Documents
Your AI agent needs knowledge to answer questions. Upload documents, connect websites, or integrate with Notion and Confluence. Docimal will automatically process, chunk, and create vector embeddings for semantic search.
Create a Knowledge Base
Click "New Knowledge Base" and give it a name
Upload Your Files
Click "Upload Files" or drag and drop your documents. You can upload multiple files at once.
Wait for Processing
Docimal will chunk, embed, and index your documents. Processing typically takes 10-30 seconds per document. You'll see a checkmark when ready.
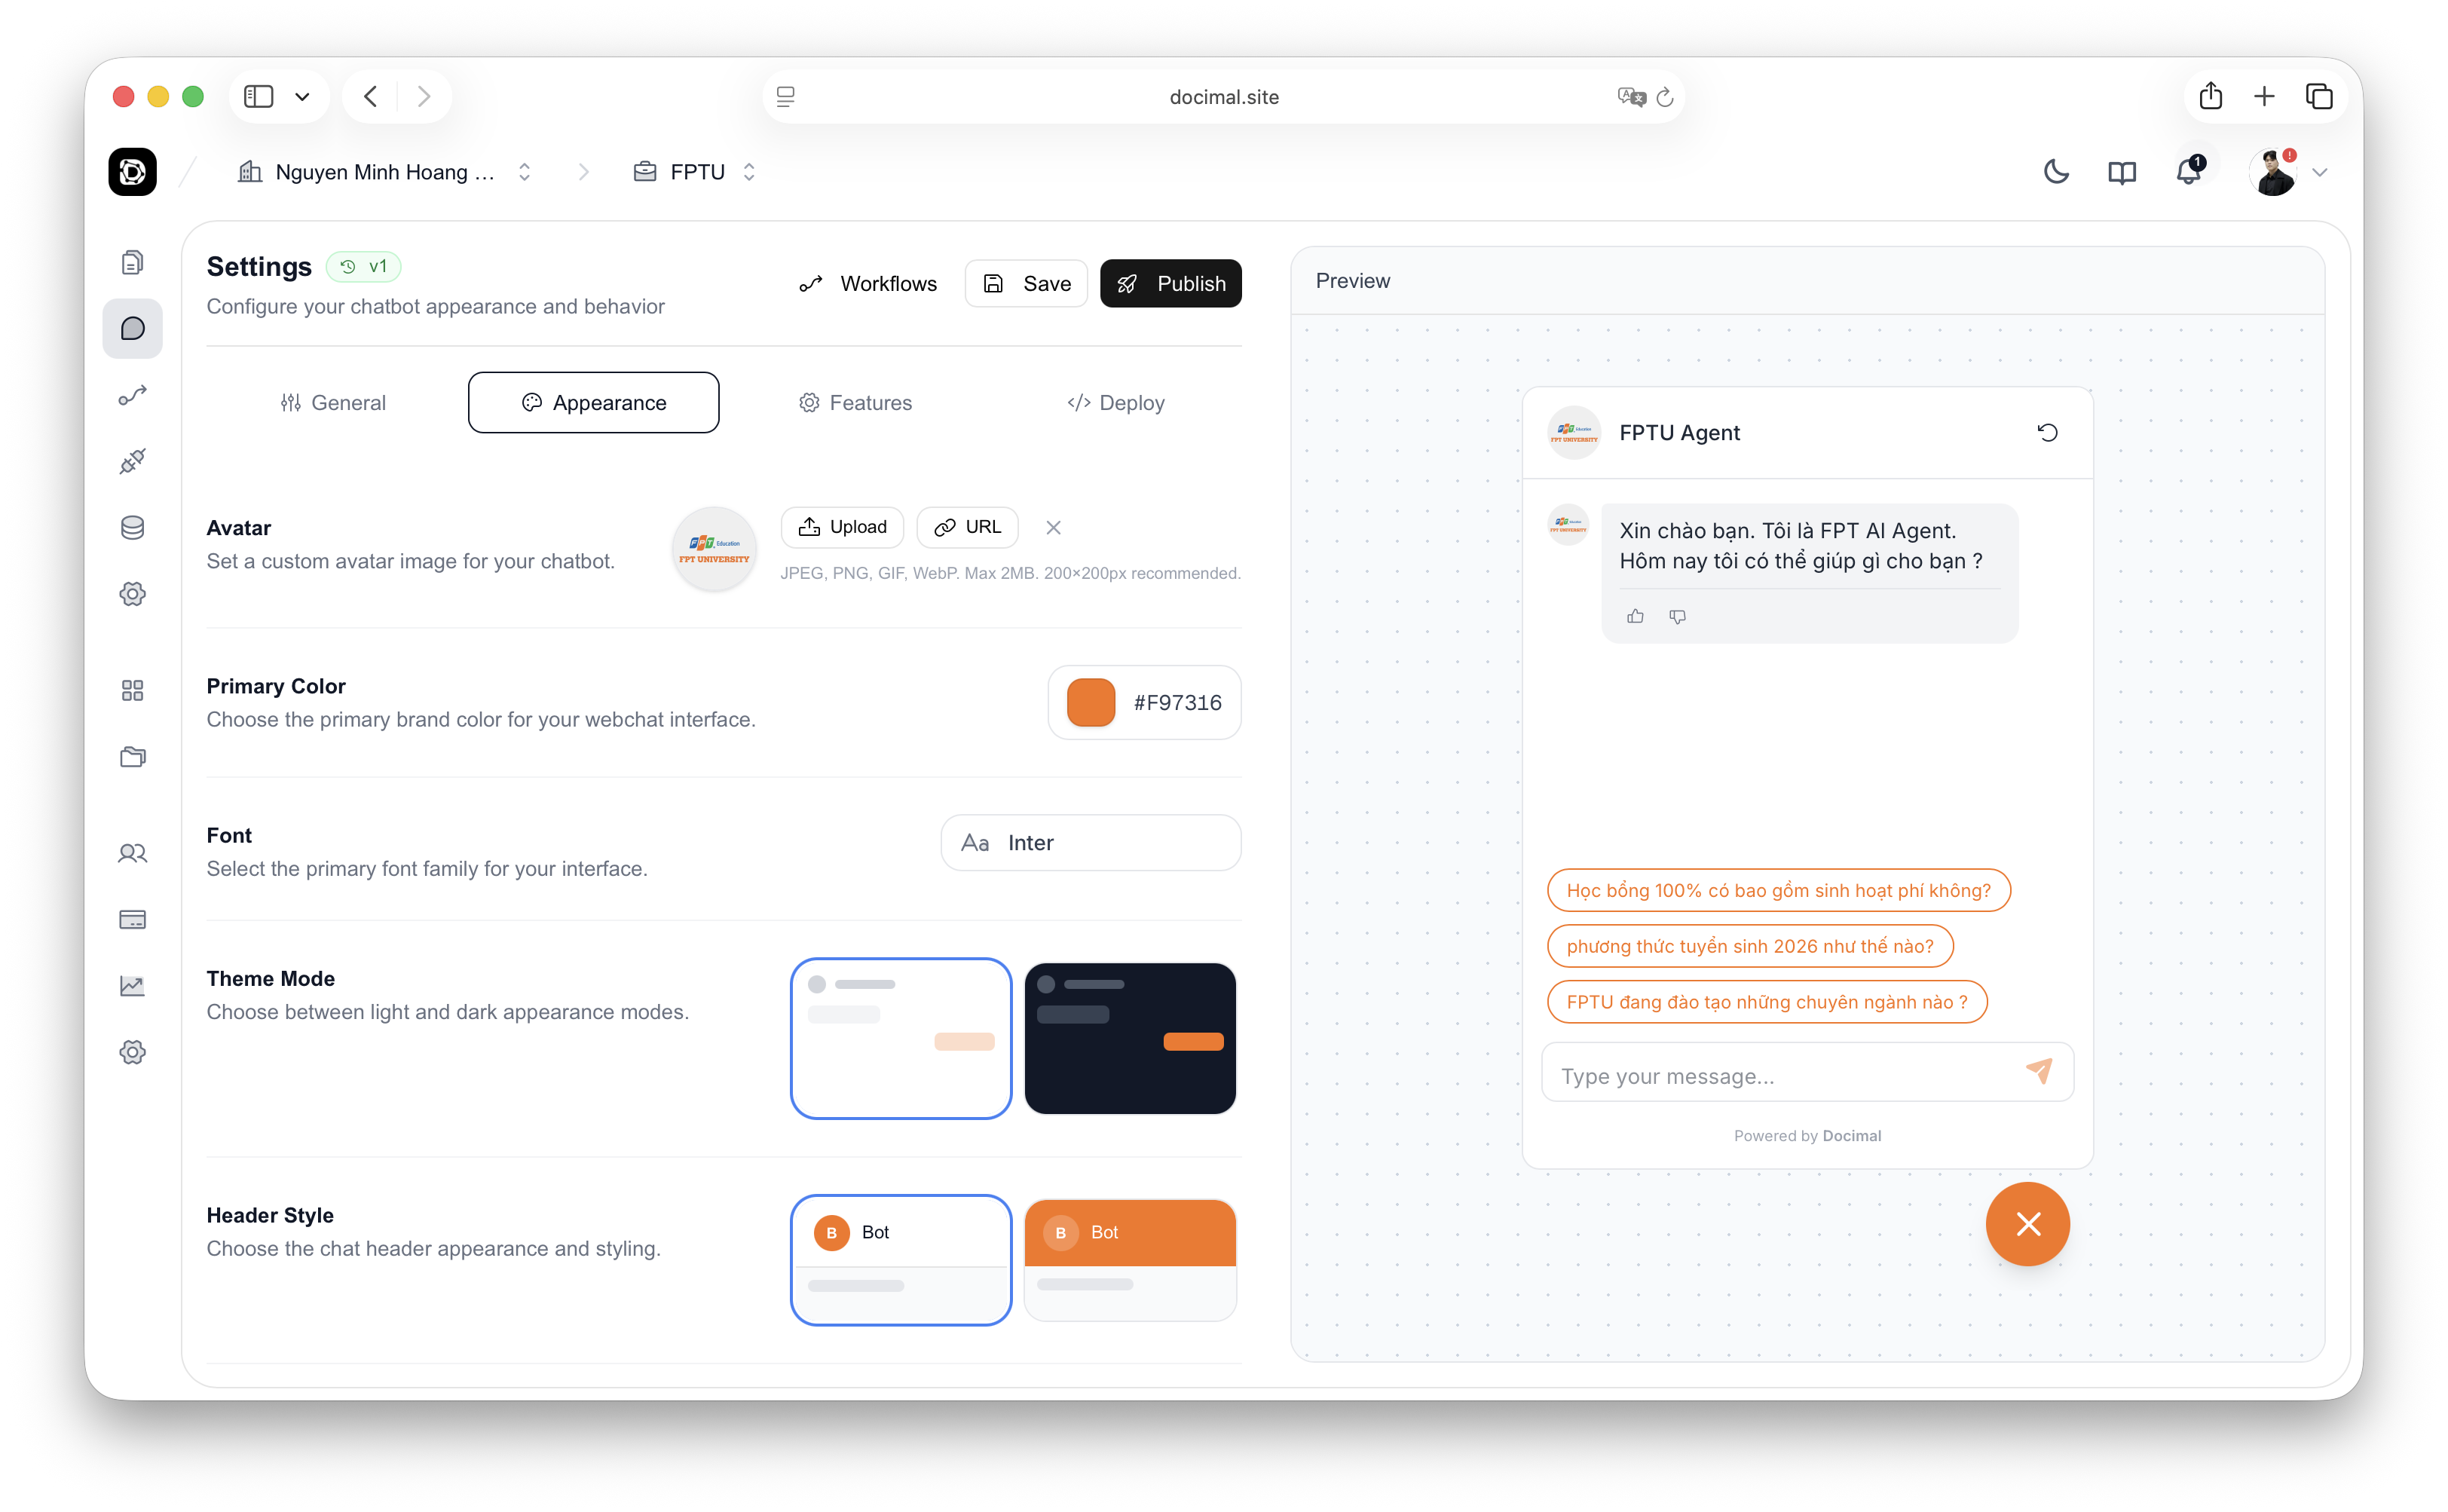
Step 3: Configure Your Agent
Configure your agent's personality, appearance, and behavior to match your brand and use case.
Configure Identity & Personality
- Set your agent's name (e.g., "SupportBot")
- Write a system prompt defining behavior
- Choose personality (Professional, Friendly, Casual)
"You are a helpful customer support agent. Answer questions based on our documentation. Be professional and cite sources."Customize Appearance
- Upload your company logo
- Set brand colors
- Choose widget style (bubble, full-page, embedded)
Link Knowledge Base
Under "Knowledge" section, select which knowledge bases your agent can access
Choose AI Model
Select from GPT-4o, GPT-4o-mini, Claude Sonnet, or other supported models
Save & Publish
Click "Save Changes", then "Publish" to make it live
Step 4: Test & Deploy
Test your agent and deploy it to your website. Docimal offers multiple deployment options to fit your needs.
Simple iframe for any platform. No JavaScript required.
Go to Deploy Tab
Navigate to "Deploy" in your chatbot dashboard
Copy Embed Code
Click "Copy JavaScript Code" or choose your preferred method
Paste into Your Website
Add the code snippet before the closing </body> tag
Test on Your Site
Refresh your website and you'll see the chat widget appear!
<script
  src="https://cdn.docimal.site/latest/docimal-chatbot.js"
  data-api-key="dcml_pk_YOUR_API_KEY"
  data-base-url="https://api.docimal.site/agents"
  async
></script>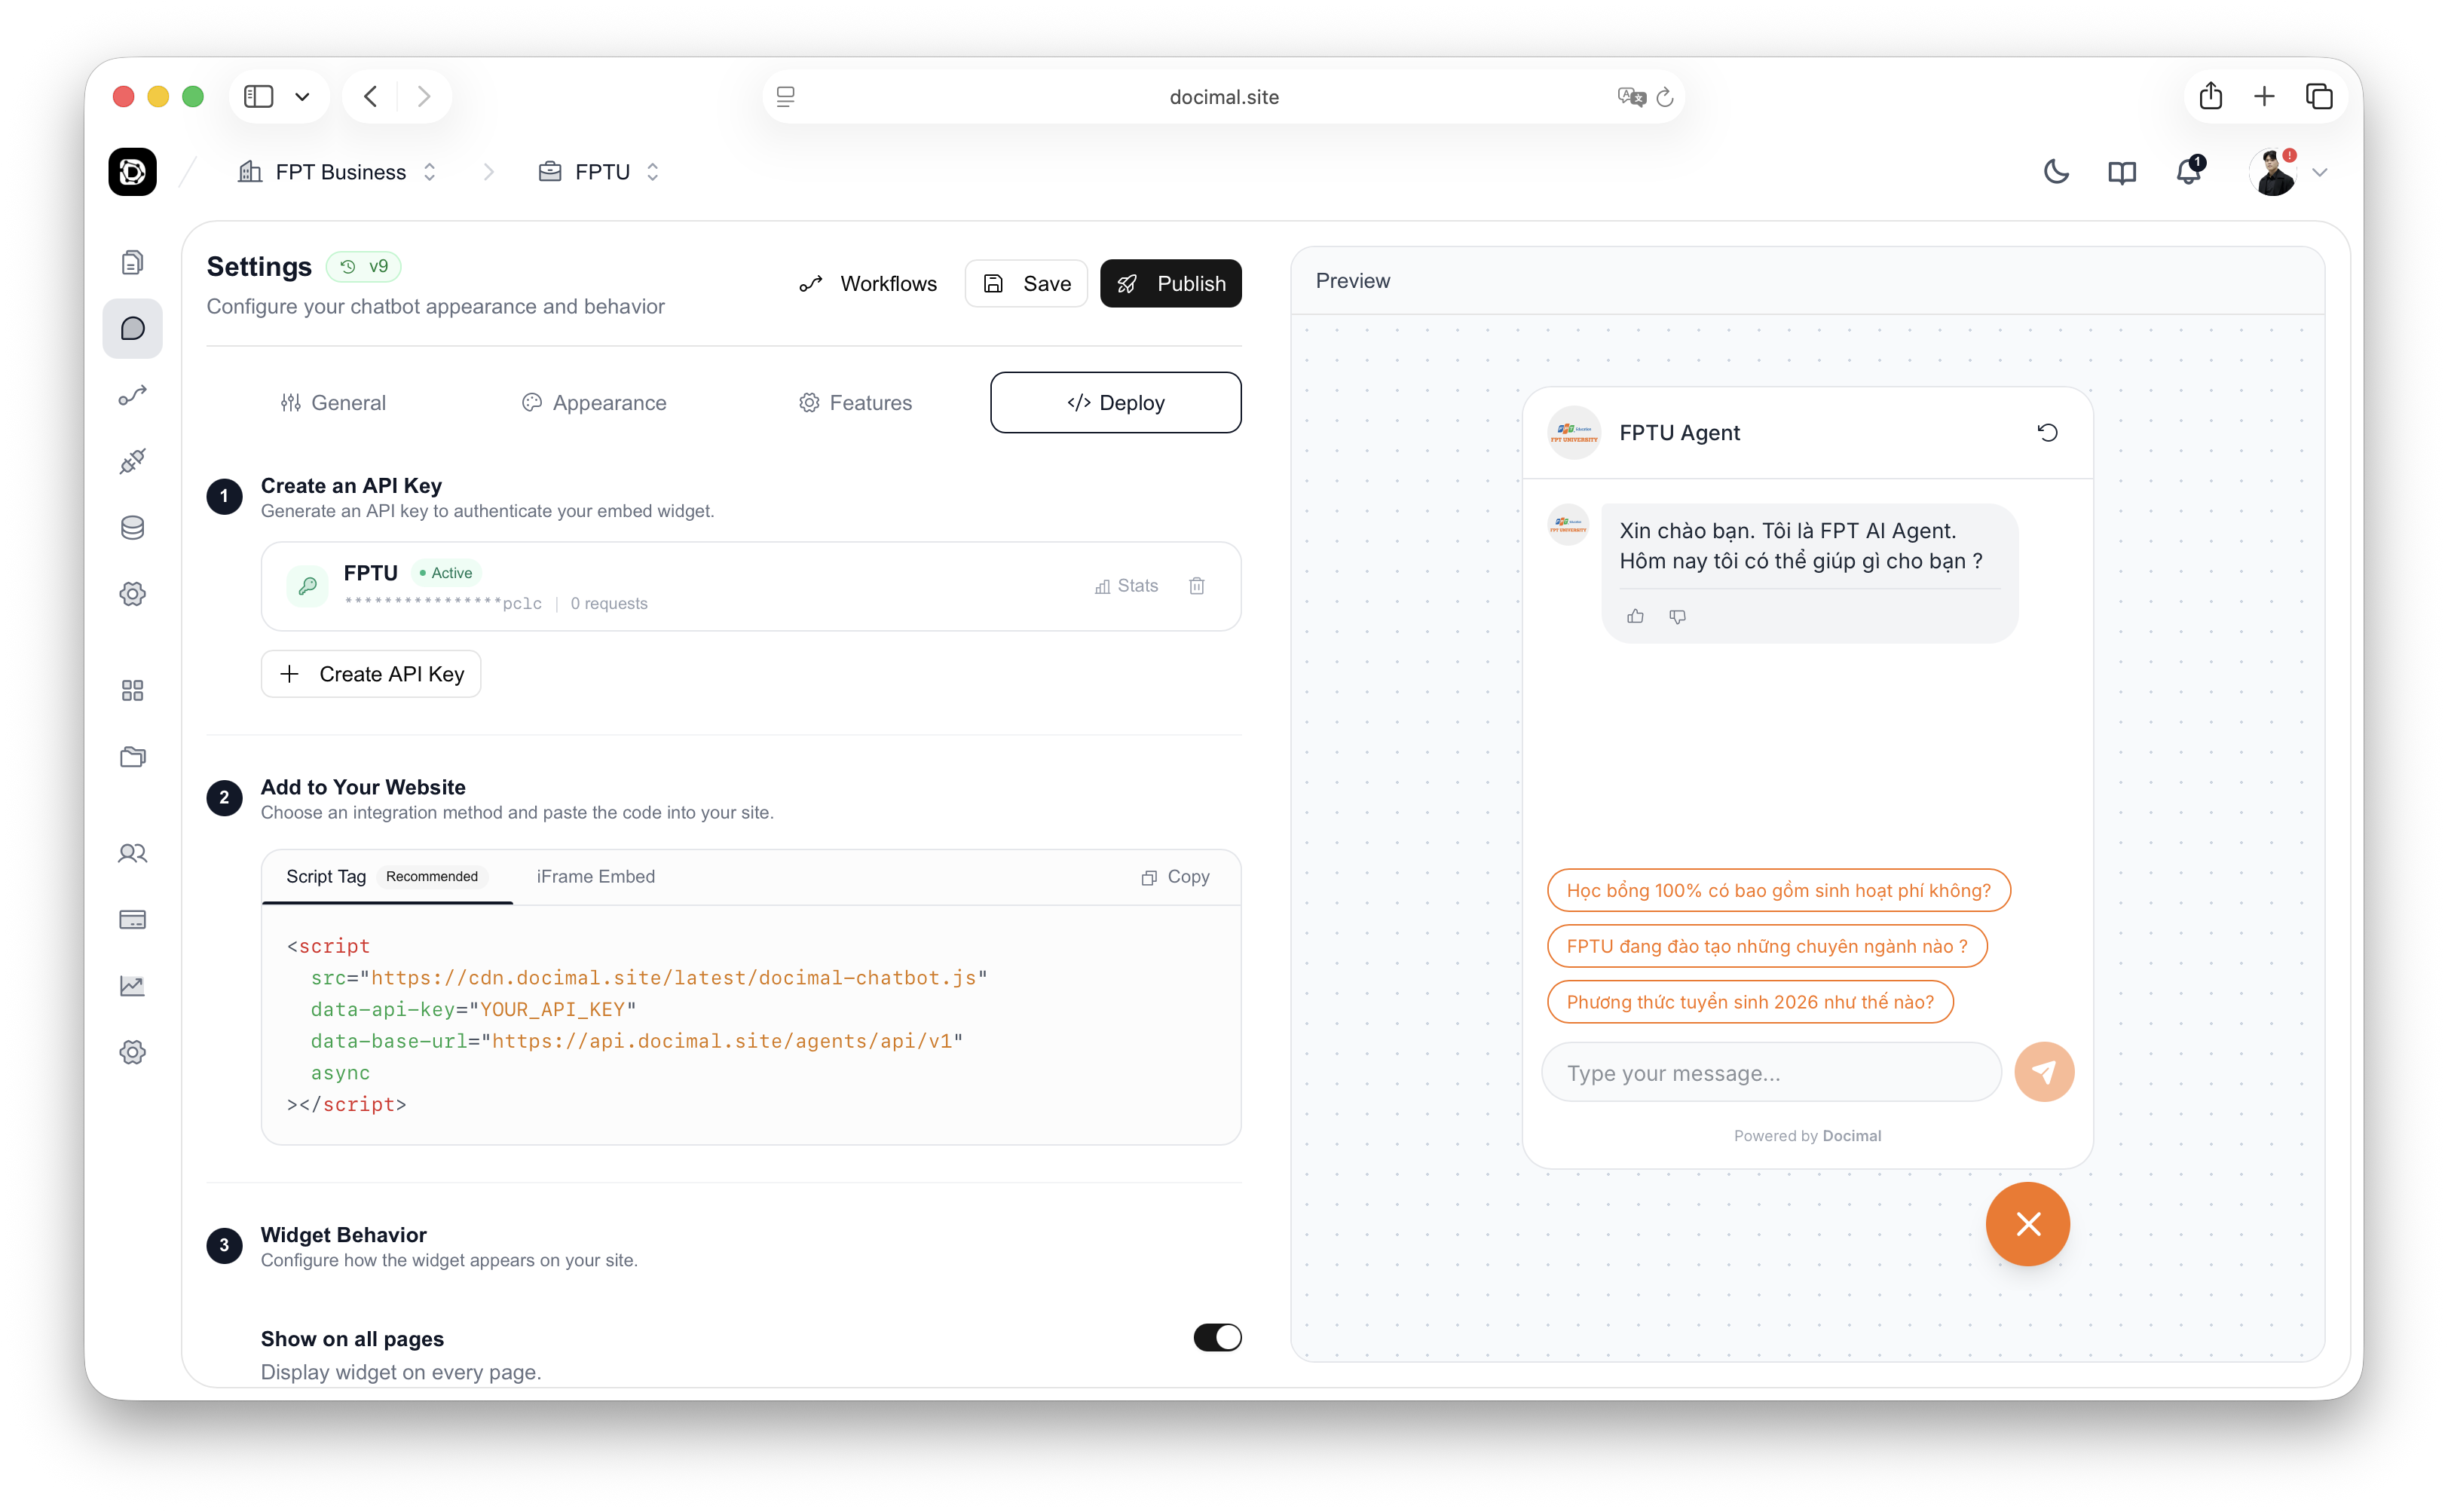
You've successfully built and deployed your first AI agent. Your agent is now live and ready to answer questions based on your documents.